Check out our guide on Kodi for more information on what Kodi is.
You need to follow a few steps to install Kodi onto onto your Fire Stick.
- Enable ‘Apps from unknown sources’
This allows you to install apps without using the official app store.
Select the navigation tabs at the top of the home screen and go to Settings > Device/My Fire TV > Developer Options.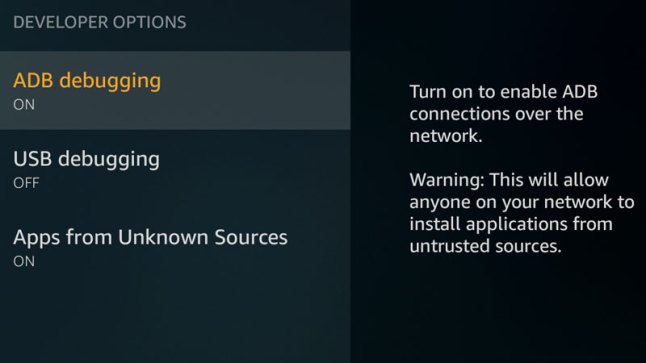
Select Apps from Unknown Sources and choose ‘On’. - Install Downloader
The downloader app will allow you to access the Kodi website so you can download it.
If you have a mic-enabled Fire Stick, hold the microphone button and say “downloader” to bring it up.
If you don’t have the mic-enabled controller, select the navigation tabs at the top of the home screen and go left to reach the search area. Type ‘downloader’ to bring it up.
Select the Downloader app and then choose install. - Download and install Kodi using the Downloader app
Open the Downloader app from your apps list from the home screen and type the following URL into the URL box at the top:
https://kodi.tv/download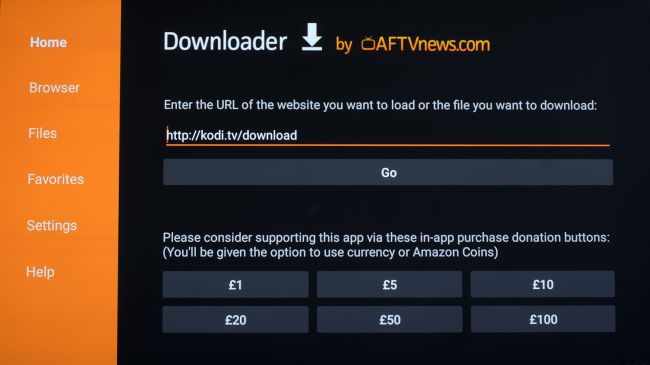
Scroll down with the remote d-pad and select the green android icon.
Select the download button under the title ‘Release’ for the ARM version. For first generation Fire Sticks, click the button with ’86-bit’, for newer generations choose ’64-bit’.
Hit down on your d-pad on the installation dialog to select ‘Install.
After installation, you’ll see an option to delete the installer file. Go ahead and delete it to free up some space. - All done!
Kodi should now appear in the ‘Recent’ section of the Fire Stick home screen. If you don’t see it you can long-press the ‘Home’ button on your remote to access your apps section.
Don’t forget to ensure you’re on a VPN when using Kodi.
Now that Kodi is installed, you’ll want to set it up. See our Kodi Builds guides on how to get Kodi streaming TV and Movies.
Your online activity is being monitored and streaming paid for content for free can result in legal repercussions. You must use a VPN to keep you safe and anonymous on the internet. See our VPN guide for details and links to get started.
Check out our Fire Stick guides on installing other apps onto your Fire Stick.