The Smokin build is provided with actively ongoing development to keep it’s add-ons nicely up to date. The developer is also active on his facebook community group, providing support to users of his build.
URL: http://doomzday.xyz/Doomzday
Installation: Doomzday wizard
Fresh start during install: Yes
Works with: Leia (18.3)
Your online activity is being monitored and streaming paid for content for free can result in legal repercussions. You must use a VPN to keep you safe and anonymous on the internet. See our VPN guide for details and links to get started.
To install Kodi onto your device, follow our Kodi installation guides. Once installed you can setup the Smokin Kodi build.
If you already have add-ons or a Kodi build installed and want to follow instructions from a vanilla Kodi as shown in the images, check out our guide on resetting Kodi for a fresh start. This build, however, offers a fresh start during install.
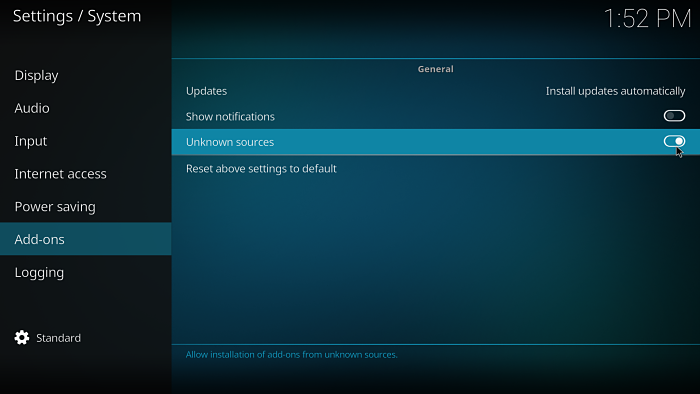
Allow unknown sources
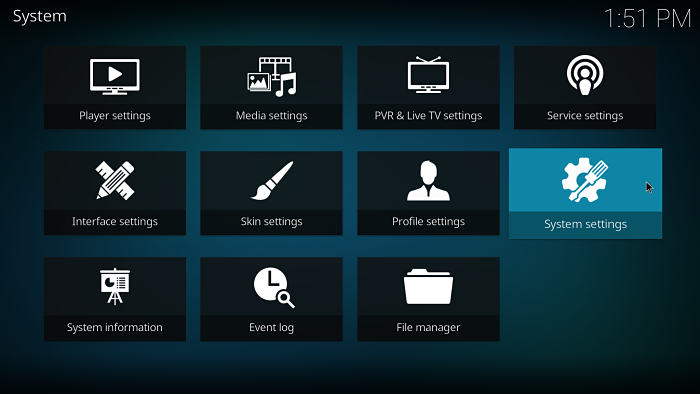
- Click the settings cog at the top left.
- Select System Settings.
- Select Add-ons and enable Unknown sources.
Install the Smokin Kodi build
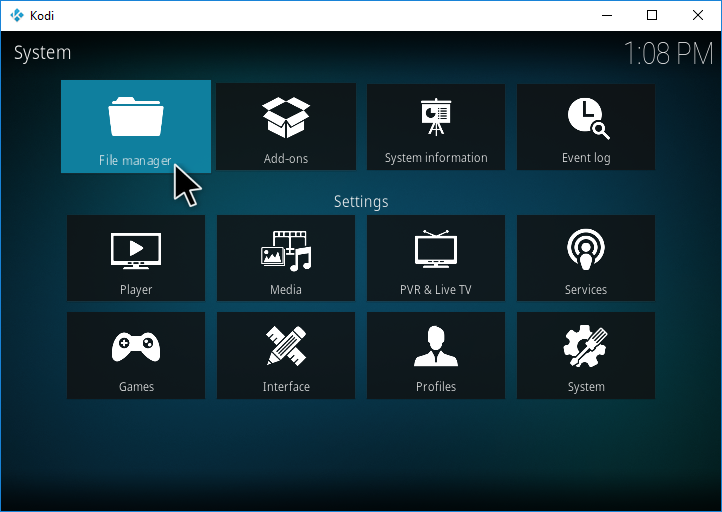
- Select the settings cog at the top left.
- Select File Manager.
- Select Add source on the left (double click if on PC).
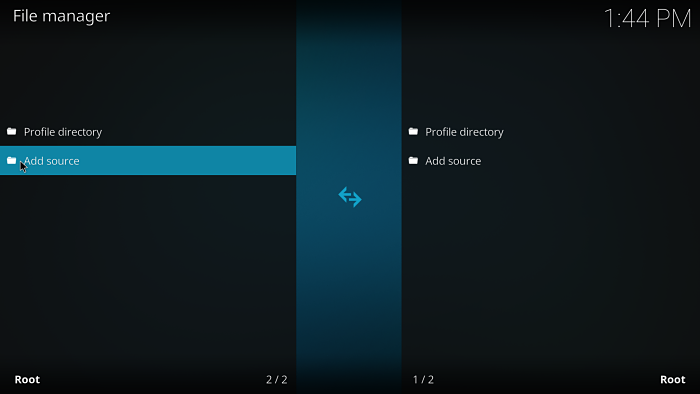
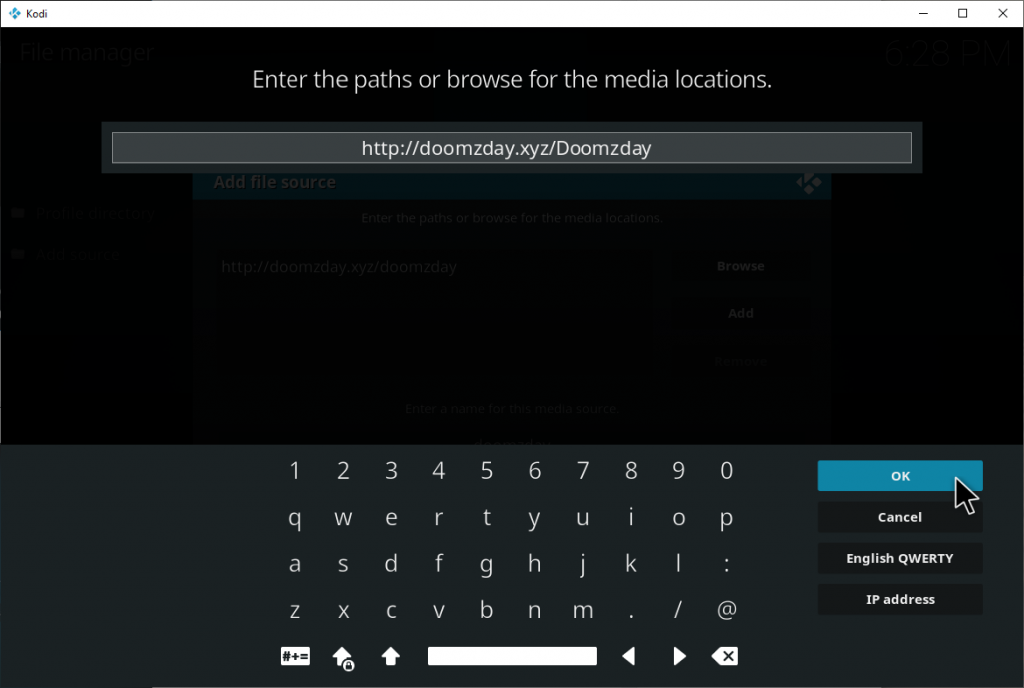
- On the Add file source dialog box, select <None> and enter:
http://doomzday.xyz/Doomzday
- Don’t forget the capital D in the link.
- Click OK.
- Select the box under where it says Enter a name for this media source. – you can leave this as Doomzday or enter (and remember) another name.
- Select OK.
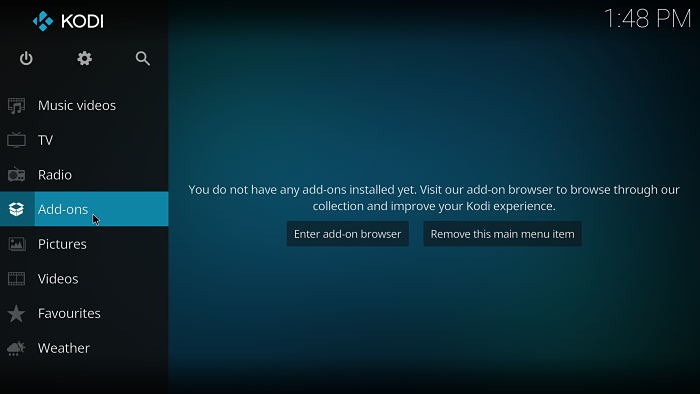
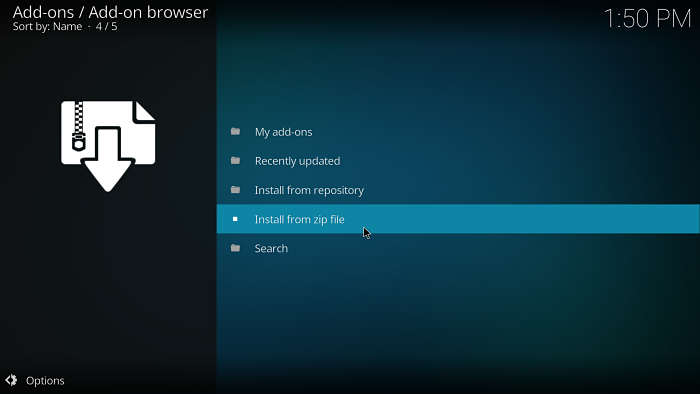
- Go back to the home screen and choose Add ons.
- Select the package installer icon at the top left.
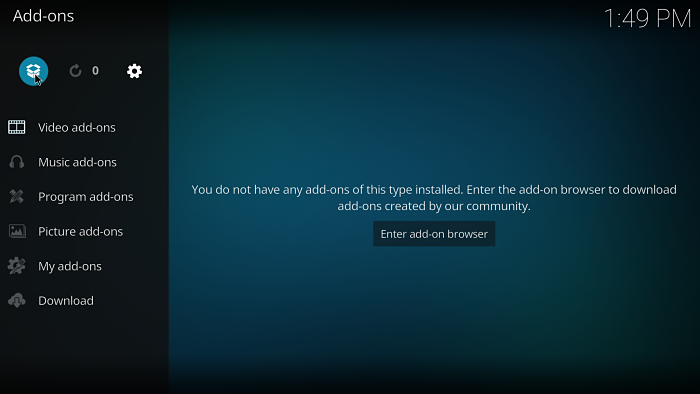
- Select Install from zip file.
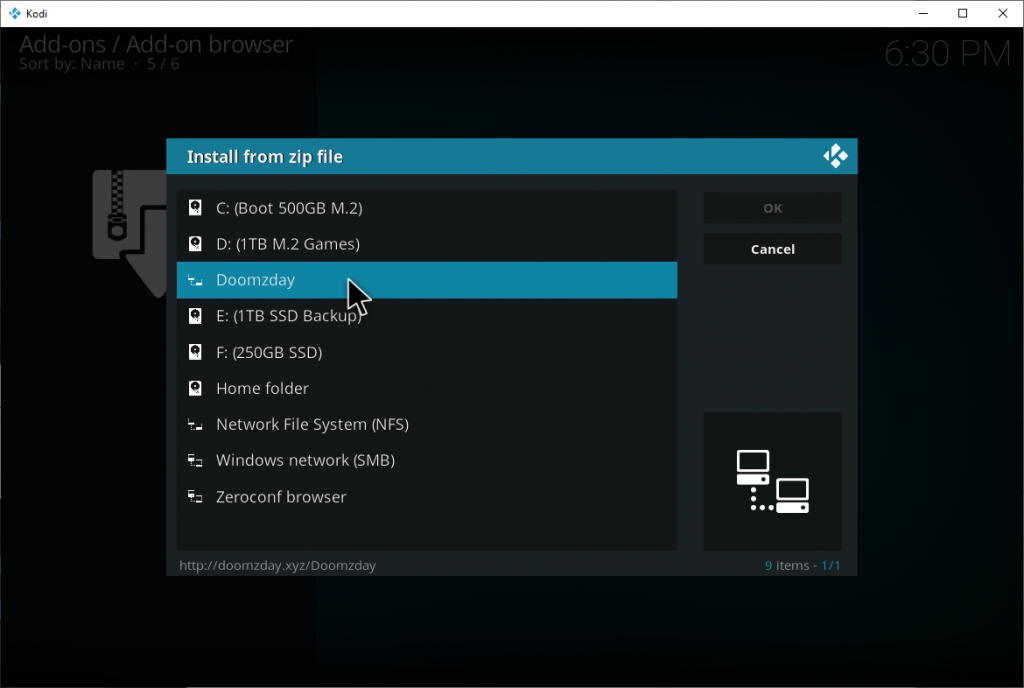
- Choose Doomzday (or whatever you named the source earlier).
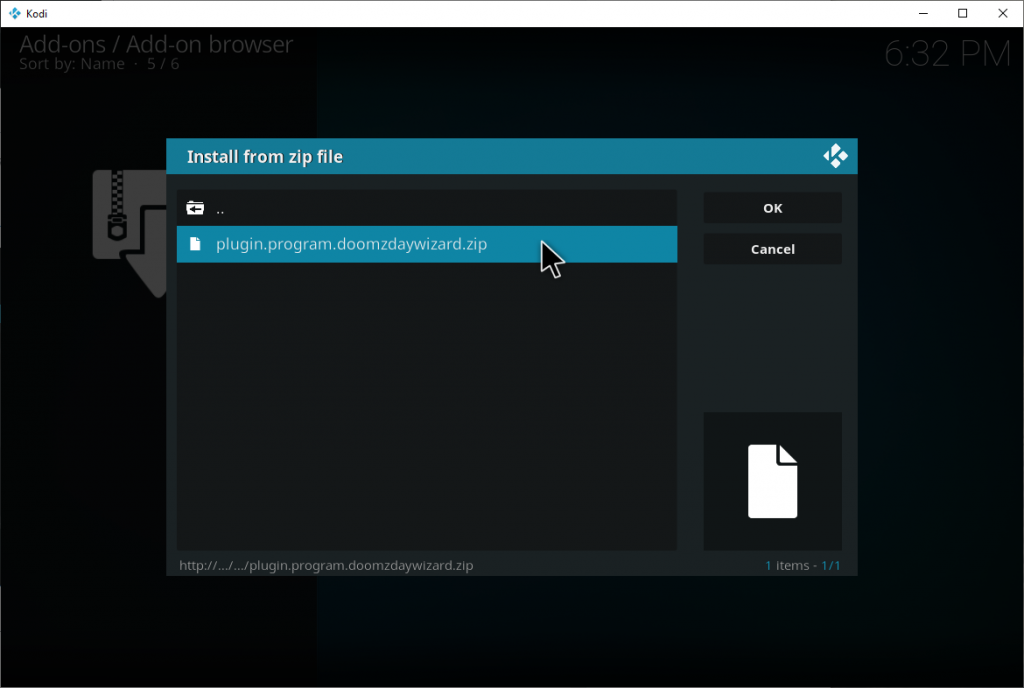
- Select plugin.program.doomzdaywizard.zip.
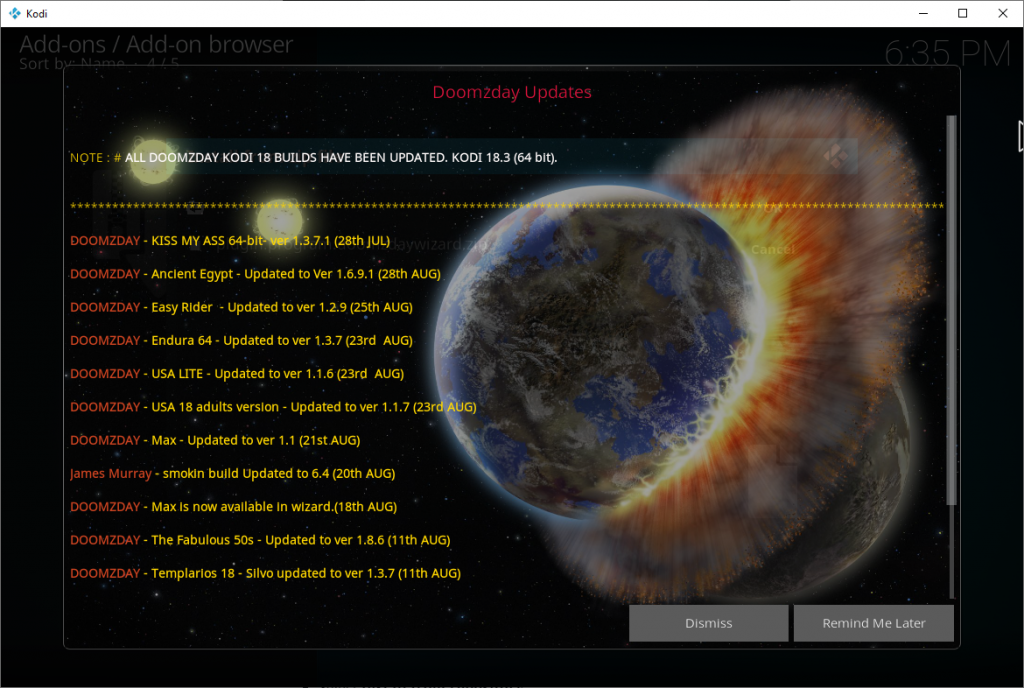
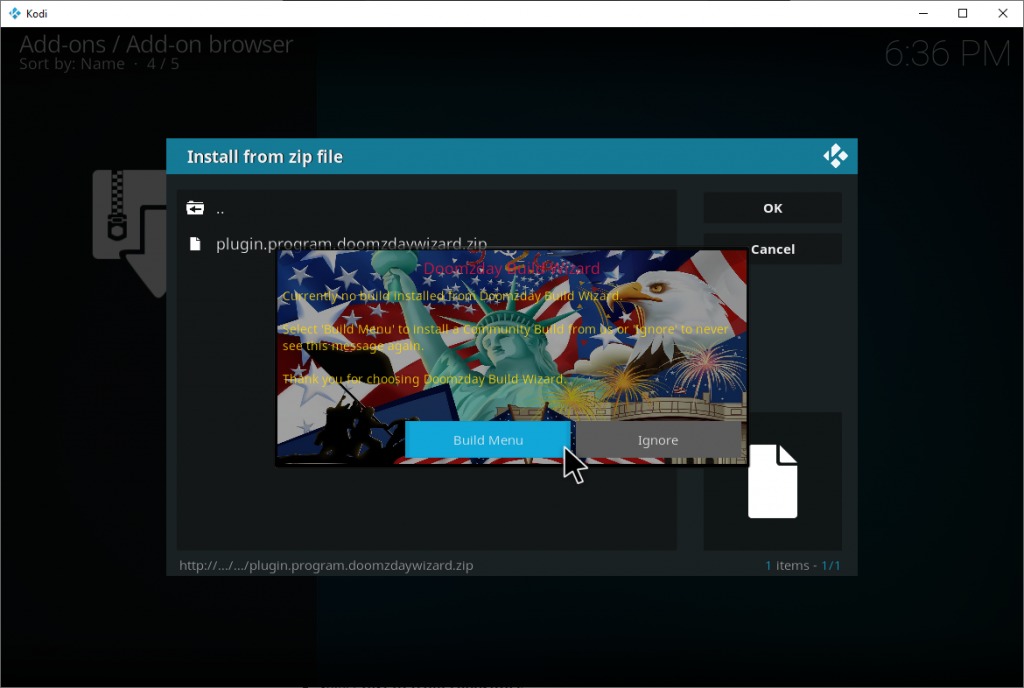
- Wait for a notification icon to appear at the top right of the screen saying Doomzday – Add-on installed.
- On the Updates pop up hit Dismiss, then OK.
- You should now be able to select Build Menu on another pop up.
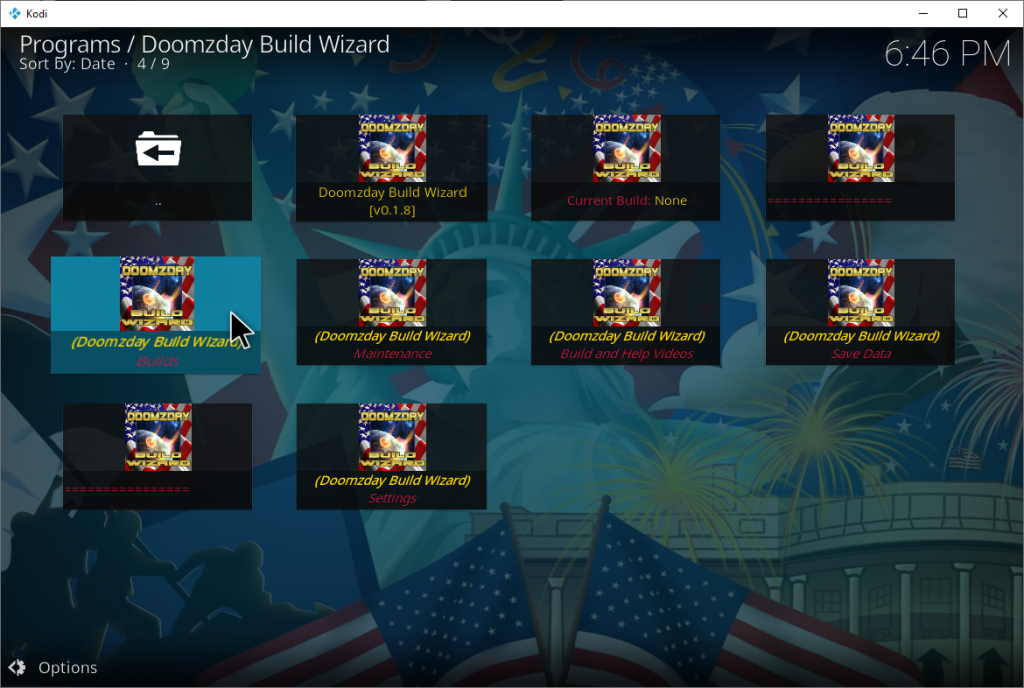
NOTE: If you don’t see this you can always navigate to Home Screen > Add-ons > Program add-ons > Doomzday Build Wizard
- Select (Doomzday Build Wizard) Builds.
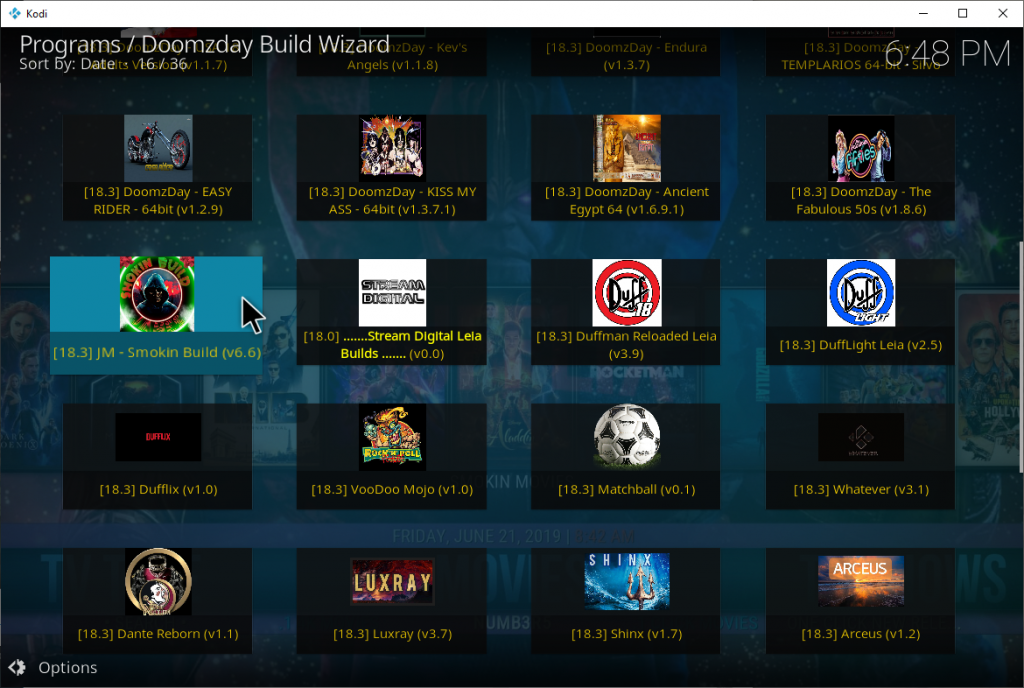
- Choose JM Smokin Build – version numbers may differ from the screen shot.
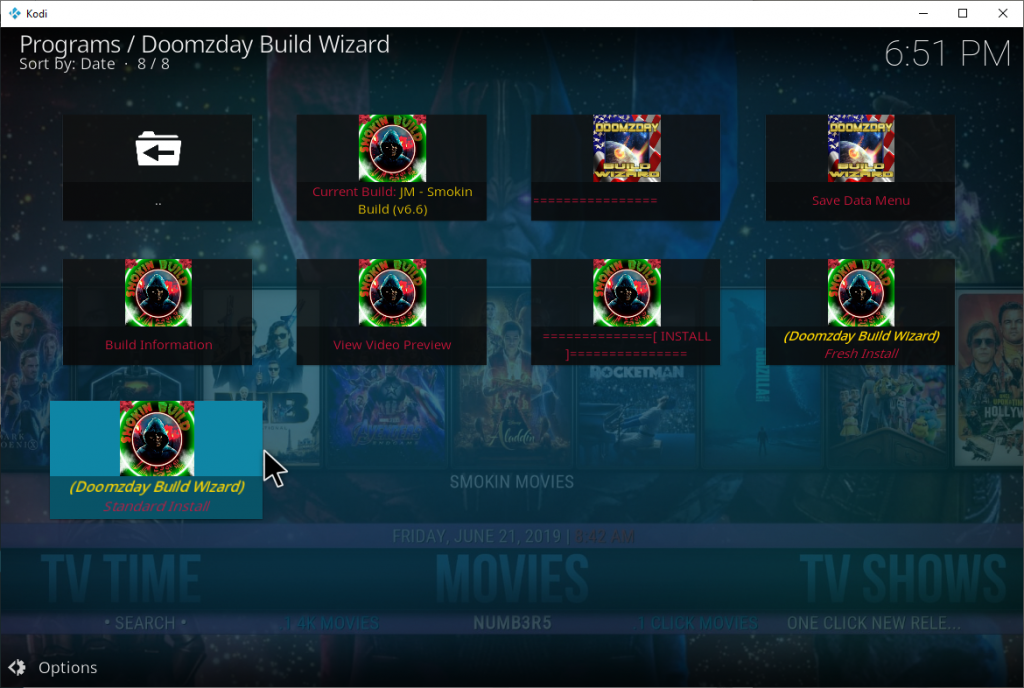
- Select (Doomzday Build Wizard) Standard Install.
NOTE: If you already have add-ons or a build installed you can select Fresh Install to clear everything out before installling the Smokin build.
- When prompted asking if you’d like to install the build hit Yes, Install.

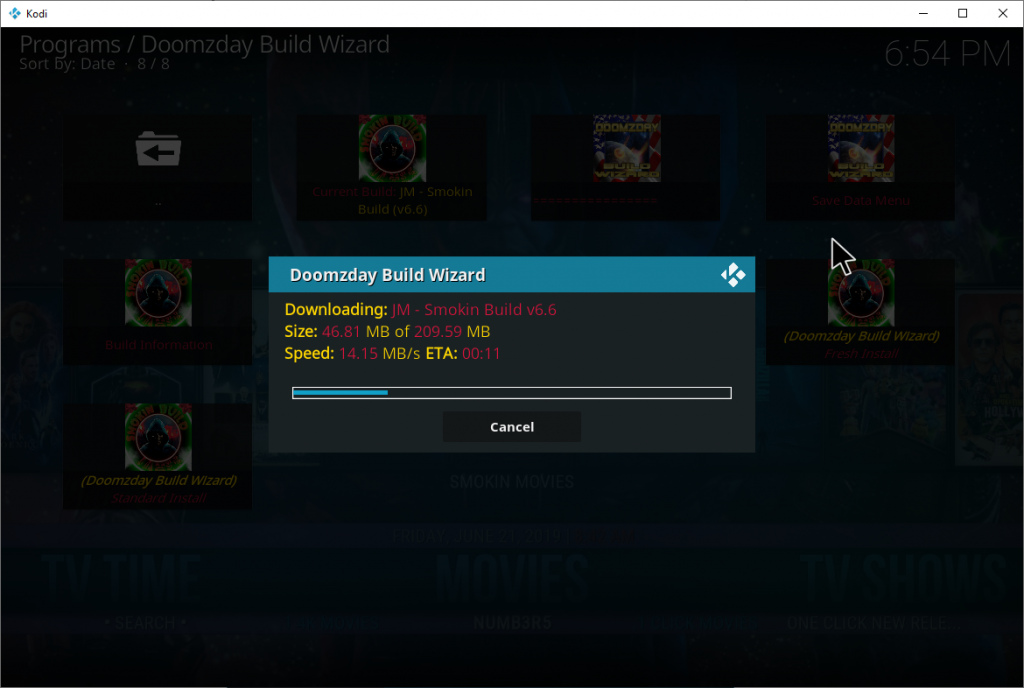
- The smokin build will then begin installing.
- Once done, hit Force Close to force Kodi to close and restart Kodi for the Smokin build to be applied.
All done!
Once started for the first time, leave Kodi for a few minutes to allow the build to perform add-on updates.
There’s a closed facebook group support community ran by the developer here if you encounter any issues.
Check out our installation guides for other builds.
Check out our Kodi Builds guide for more builds.
Want to remove the Smokin build? Follow this guide for a fresh start.